What is spiral wedging
Wedging clay is the process of preparing clay to be used in a project by making it malleable, distributing moisture evenly, and removing air bubbles. A common way of wedging is called spiral wedging where clay is kneaded in a circular motion.
What you’ll need to get started
- block of clay
- cutoff tool
- large canvas board (optional)
How to spiral wedge clay
In the next few steps, we’ll show you the proper way to wedge clay using the spiral technique and things to avoid.
Amount and shape of the clay
To start, you’ll need clay. One of the benefits of the spiral wedging technique is that you can do it with a large amount of clay.
The clay should either be in a cylinder or block shape. You can create a block of clay using a cutoff tool.
I like to use a clean and large canvas board to prevent the clay from sticking to the surface or anything (debris, crumbs, etc) sticking to the clay.
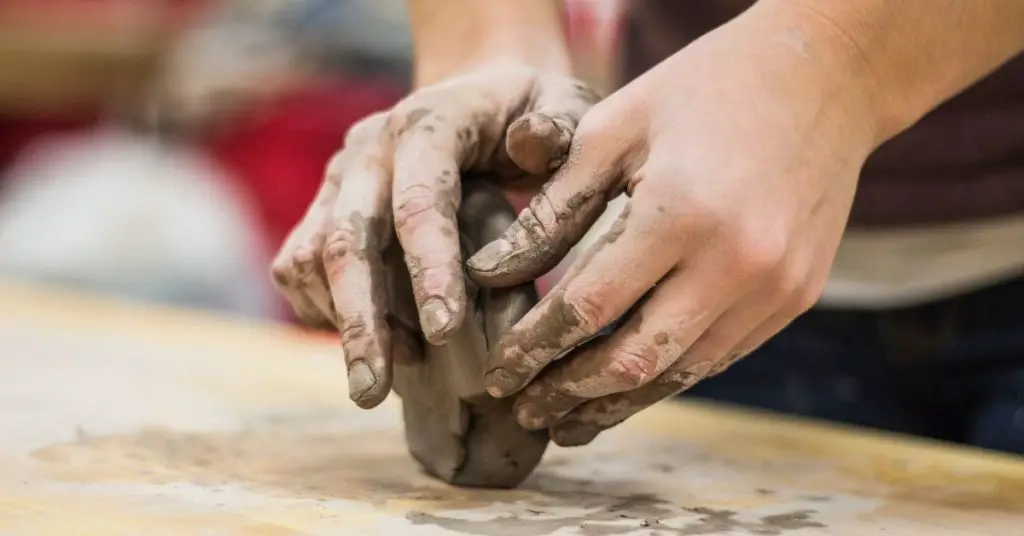
Spiral wedging technique
First, place your hands on both sides of the cylinder or block that you picked out from the previous step.
Press down on the clay with both of your palms and twist the clay mass in a clockwise motion.
Next, rotate the clay toward you so that a new part of the clay mass is on top. Repeat the clockwise motion, pushing down and twisting with both your hands.
Repeat this 50-100 times. This sounds like a lot, but it will fly by.
Things to avoid
Make sure to push with consistent pressure. Consistency ensures the moisture is evenly distributed and clay particles are aligned properly.
Also, don’t push too hard. The name of the game is repetition. The more motions you repeat, the better the outcome.
Lastly, watch what you’re doing. The spiral motion can create a hole in the middle of your clay. A hole in the middle will become an air bubble.
Ensuring the clay is free of air bubbles
You’ve done all this work, but how do you know for sure the wedging has done its job?
If you cut the clay in half, you’ll be able to see if air bubbles are still present. You’ll also be able to tell if the clay is too hard based on the resistance against the cutting tool.
Starting your project
OK, you have the clay properly wedged. What’s next?
Once you’re satisfied that the clay has been properly wedged, cut the material into the correct size rectangles for the planned piece.
I recommend starting the wedging process again if at any point you see air bubbles. It’s better to be a little sore from wedging than to lose your piece to the kiln after all that work!
Conclusion
Spiral wedging is one of 4 common ways to wedge clay. If you want to see alternative methods, I recommend our piece on wedging clay.
Let us know if you have questions by emailing hello@wheelandclay.com. We’d love to hear from you!